Employee & HR Management, LoomMate Journey: Learn Step by Step

How to Track Attendance in LoomMate?

How to Track Attendance in LoomMate? Monitoring employee attendance is essential for efficient workforce management. LoomMate makes it easy to record, track, and review attendance, ensuring smooth HR operations. 🎥 Video Walkthrough (Watch the video below for a complete step-by-step tutorial. Prefer reading? Continue with the guide.) Step-by-Step Guide to Tracking Attendance Step 1: Open the Attendance Section From the Dashboard, go to HR → Attendance. You’ll see a list of all employees with their daily attendance records. Step 2: Add Daily Attendance Click on + Add Attendance. Select the Date. Mark each employee as: Present Absent Leave Half-Day (if applicable) Step 3: Save Attendance Records After marking attendance, click Save to update records. The attendance will now appear in the Attendance Dashboard. Step 4: Edit or Update Attendance If any errors are made, use the Edit option to correct them. Attendance records can be updated for past dates if needed. Step 5: Generate Attendance Reports Click Generate Report to view attendance summaries for a specific date range. Export reports as Excel / PDF for payroll or HR audits. Troubleshooting Tips Cannot find an employee? Make sure the employee is added in the Employee List. Attendance not saving? Check that all required fields (date, status) are filled. Report mismatch? Ensure the correct date range is selected. Next Steps Now that you can track attendance in LoomMate, you can: Use the data to calculate salary and payroll accurately Monitor employee performance and absentee patterns Move on to the next tutorial: How to Manage Salary in LoomMate


Employee & HR Management, LoomMate Journey: Learn Step by Step

How to Manage Employees in LoomMate?

How to Manage Employees in LoomMate? Efficient employee management is crucial for smooth textile operations. LoomMate allows you to add, track, and manage all employees, including their roles, attendance, and salary details — all from one dashboard. Video Walkthrough (Watch the video below for a complete step-by-step tutorial. Prefer reading? Continue with the guide.) Step-by-Step Guide to Managing Employees Step 1: Open the Employee Section From the Dashboard, go to HR → Employees. Click on + Add New Employee to create a record. Step 2: Enter Employee Details Fill in the following information: Full Name Employee ID (auto-generated or manual) Contact Information (Phone, Email) Designation / Role Department (optional) Joining Date Step 3: Save the Employee Record Click Save to add the employee to your database. The employee will now appear in the Employee List. Step 4: Edit or Delete Employee Use the Edit option to update employee information. Use Delete if an employee leaves (ensure no pending tasks or salary records are active). Step 5: Track Employee Details From the employee record, you can view: Attendance Salary history Assigned tasks or responsibilities Troubleshooting Tips Cannot find an employee? Make sure they are added to the Employee List. Incorrect details? Edit the record immediately to prevent payroll or attendance issues. Deletion blocked? Check for pending salary or linked tasks before deleting. Next Steps Now that your employee database is set up in LoomMate, you can: Track attendance and salary effectively Assign roles and monitor performance Move on to the next tutorial: How to Track Attendance in LoomMate

Finance & Accounting, LoomMate Journey: Learn Step by Step

How to Record Extra Income in LoomMate?

How to Record Extra Income in LoomMate? Tracking extra income outside of regular sales is important for accurate accounting. LoomMate allows you to record additional earnings, so your financial records are complete and transparent. Video Walkthrough (Watch the video below for a complete step-by-step tutorial. Prefer reading? Continue with the guide.) Step-by-Step Guide to Recording Extra Income Step 1: Open the Extra Income Section From the Dashboard, go to Finance → Extra Income. Click on + Add Extra Income. Step 2: Enter Income Details Fill in the following information: Source / Description (e.g., Interest Income, Miscellaneous Sales) Amount Date Payment Method (Cash, Bank, UPI, etc.) Notes (optional) Step 3: Save the Income Record Click Save to record the income. The entry will now appear in the Extra Income Dashboard. Step 4: Link to Ledger (Optional) You can link the extra income entry to the Ledger for consolidated financial tracking. Step 5: Generate Reports Use the Generate Report option to export extra income data for accounting or review. Troubleshooting Tips Entry not saving? Ensure all mandatory fields (Source, Amount, Date) are filled. Incorrect amount? Edit the entry immediately before linking to Ledger. Report missing data? Check the date range and filters. Next Steps Now that you can record extra income in LoomMate, you can: Keep all financial records up to date Monitor additional revenue streams alongside regular sales Move on to the next tutorial: How to Manage Employees in LoomMate

Finance & Accounting, LoomMate Journey: Learn Step by Step

How to Use the Ledger in LoomMate

How to Use the Ledger in LoomMate? A ledger is crucial for tracking all financial transactions in your textile business. LoomMate’s Ledger feature helps you monitor income, expenses, invoices, and payments — all in one place for accurate accounting. Video Walkthrough (Watch the video below for a complete step-by-step tutorial. Prefer reading? Continue with the guide.) Step-by-Step Guide to Using the Ledger Step 1: Open the Ledger Section From the Dashboard, go to Finance → Ledger. You’ll see a list of all transactions sorted by date. Step 2: View Transaction Details Click on any transaction to see: Date Type (Income / Expense) Linked Invoice or Order Amount Payment Status Step 3: Add a New Transaction Click + Add Transaction if you want to record: Income (e.g., received payment from client) Expense (e.g., raw material purchase, utility bills) Fill in the required details and click Save. Step 4: Filter and Search Transactions Use filters like: Date range Transaction type (Income / Expense) Client or Supplier Use the search bar to quickly find a specific entry. Step 5: Generate Ledger Reports Click Generate Report to export your ledger in Excel / PDF for accounting or audits. Troubleshooting Tips Transaction missing? Ensure it’s linked to the correct invoice or expense record. Incorrect amount? Edit the transaction before finalizing the ledger. Report not generating? Check filters and date range; ensure there is data for the selected period. Next Steps Now that you know how to use the Ledger in LoomMate, you can: Track all financial transactions in one place Reconcile income and expenses easily Move on to the next tutorial: How to Record Extra Income in LoomMate

LoomMate Journey: Learn Step by Step, Orders & Transactions

How to Create an Invoice in LoomMate?

How to Create an Invoice in LoomMate? Invoices are essential for tracking sales and ensuring timely payments from clients. LoomMate makes creating and managing invoices quick, accurate, and linked directly to your orders. Video Walkthrough (Watch the video below for a complete step-by-step tutorial. Prefer reading? Continue with the guide.)   Step-by-Step Guide to Creating an Invoice Step 1: Open the Invoice Section From the Dashboard, go to Finance → Invoices. Click on + Create New Invoice. Step 2: Select the Client Choose the client from your Clients List. If it’s a new client, add them first using + Add New Client. Step 3: Add Order Details Select the Sell Order(s) to link with this invoice. The items, quantity, and price will automatically populate from the order. Step 4: Add Additional Charges (if any) You can include: Taxes (GST, VAT, etc.) Discounts Shipping / Handling Charges Step 5: Review & Confirm Verify all details: client info, items, amounts, and taxes. Click Save & Generate Invoice. Step 6: Send or Export Invoice Use the Send via Email option to deliver the invoice to the client. Export or print the invoice as PDF for records. Troubleshooting Tips Client details incorrect? Edit the client record before generating the invoice. Invoice total doesn’t match? Ensure taxes, discounts, and quantities are entered correctly. Invoice not saving? Check if the linked sell order is confirmed and not in draft mode. Next Steps Now that you know how to create invoices in LoomMate, you can: Track pending and paid invoices in the dashboard Link invoices with your Ledger for financial tracking Move on to the next tutorial: How to Use the Ledger in LoomMate

Client & Relationship Management, LoomMate Journey: Learn Step by Step

How to Manage Clients in LoomMate?

How to Manage Clients in LoomMate? Keeping accurate client records is essential for smooth business operations. LoomMate allows you to manage all your customers in one place — from adding new clients to tracking their orders and payments. Video Walkthrough (Watch the video below for a complete step-by-step tutorial. Prefer reading? Continue with the guide.) Step-by-Step Guide to Managing Clients Step 1: Open the Client Section From the Dashboard, go to Sales → Clients. Click on + Add New Client to create a new record. Step 2: Enter Client Details Fill in the following information: Client Name Contact Person Phone Number / Email Address GST Number (if applicable) Payment Terms / Credit Limit (optional) Step 3: Save the Client Record Click Save to add the client to your database. The client will now appear in your Clients List. Step 4: Edit or Delete Client Use the Edit option to update client information. Use Delete if a client is no longer active (ensure no pending orders exist). Step 5: Track Client Orders From the client record, you can quickly view all purchase and sell orders linked to them. This helps in monitoring order history and pending payments. Troubleshooting Tips Cannot find a client? Make sure they are added in the client list. Incorrect details? Edit the client record immediately to prevent errors in orders or invoices. Client deletion blocked? Check if the client has active orders — you must clear them first. Next Steps Now that your client database is set up in LoomMate, you can: Link clients to Sell Orders for faster processing Track pending payments and order history Move on to the next tutorial: How to Create Invoices in LoomMate

Finance & Accounting, LoomMate Journey: Learn Step by Step

How to Manage Expenses in LoomMate?

How to Manage Expenses in LoomMate? Keeping track of expenses is vital for controlling costs in any textile business. LoomMate makes expense management simple, allowing you to record, categorize, and review all your business spending in one place. Video Walkthrough (Watch the video below for a complete step-by-step tutorial. Prefer reading? Continue with the guide.) Step-by-Step Guide to Managing Expenses Step 1: Open the Expense Section From the Dashboard, go to Finance → Expenses. Click on + Add New Expense. Step 2: Enter Expense Details Fill in the following information: Expense Category (e.g., Electricity, Rent, Raw Materials, Transport) Amount Date Payment Method (Cash, Bank, UPI, etc.) Notes (optional, e.g., Bill Number, Description) Step 3: Save the Expense Click Save & Confirm to add the expense record. The expense will now appear in your Expense List Dashboard. Step 4: View and Manage Expenses Use filters to view expenses by Category, Date Range, or Amount. Edit or delete any entry if needed. Step 5: Generate Expense Reports Click on Generate Report to see your expenses in detail. Export reports to Excel / PDF for accounting or audits. Troubleshooting Tips Duplicate expense entry? Use the delete option to remove extra records. Wrong category? Edit the expense and update to the correct category. Report not matching? Check if all expenses are confirmed and not left in draft mode. Next Steps Now that you’ve learned how to manage expenses in LoomMate, you can: Monitor your business spending effectively Compare expenses with income using Reports Move on to the next tutorial: How to Manage Clients in LoomMate

Finance & Accounting, LoomMate Journey: Learn Step by Step

How to Generate and View Reports in LoomMate

How to Generate and View Reports in LoomMate? Reports are the backbone of smart business decisions. With LoomMate, you can instantly generate detailed reports on your textile operations — from purchase and sales to inventory, expenses, and employee management — all in one place. Video Walkthrough (Watch the video below for a complete step-by-step tutorial. Prefer reading? Continue with the guide.) Step-by-Step Guide to Generating Reports Step 1: Open the Reports Section From the Dashboard, go to Reports in the main menu. You’ll see different categories of reports available. Step 2: Select the Report Type Choose the type of report you want to view, such as: Purchase Report (track all purchase orders) Sell Report (monitor customer orders & invoices) Inventory Report (check stock levels & usage) Taka Report (fabric roll movement & status) Expense Report (business expenses overview) Employee Report (attendance & salary details) Step 3: Apply Filters Narrow down your report using filters like: Date range Customer or Supplier Product / Yarn type Status (Pending, Completed, etc.) Step 4: Generate the Report Click on Generate / View Report. LoomMate will display the data instantly in table or chart format. Step 5: Export or Print Use the Export option to download reports in Excel / PDF. Click Print if you need a hard copy. Troubleshooting Tips Report looks empty? Make sure the date range or filters are correct. Missing data? Check if the related purchase/sell order is confirmed in the system. Export not working? Ensure your browser/app has permission to download files. Next Steps Now that you can generate reports in LoomMate, you can: Track business performance in real-time Share insights with your team or management Move on to the next tutorial: How to Manage Expenses in LoomMate

LoomMate Journey: Learn Step by Step, Orders & Transactions

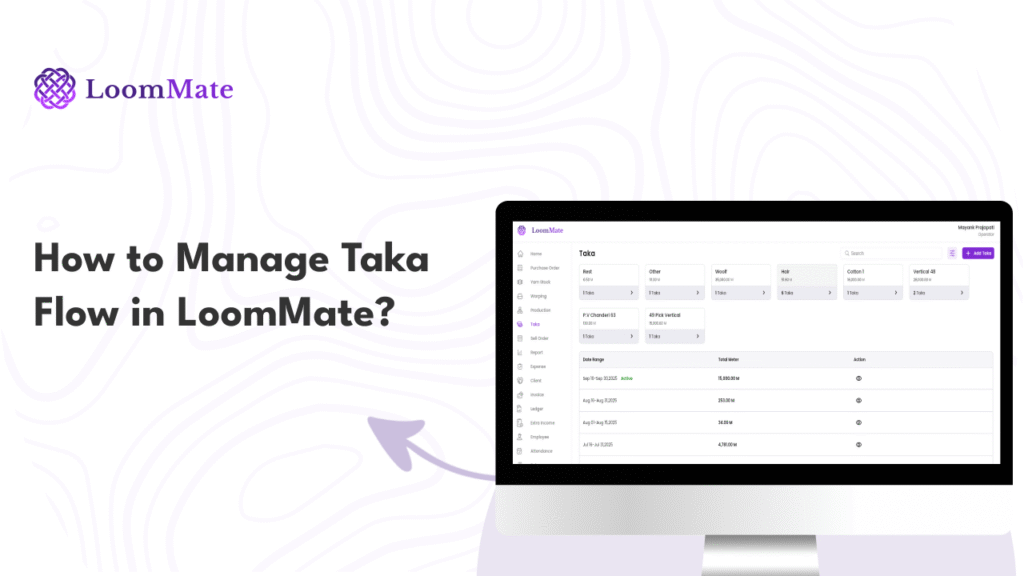
How to Manage Taka Flow in LoomMate?

How to Manage Taka Flow in LoomMate In textile operations, every taka (fabric roll) matters. LoomMate’s Taka Flow feature helps you track each roll, from production to sales, so you can maintain complete control over your inventory and avoid confusion. Video Walkthrough (Watch the video below for a complete step-by-step tutorial. Prefer reading? Continue with the guide.) Step-by-Step Guide to Managing Taka Flow Step 1: Open the Taka Flow Section From the Dashboard, go to Production → Taka Flow. Click on + Add New Taka to start. Step 2: Enter Taka Details Fill in the following information: Loom / Machine Number Taka Number (auto-generated or manual) Fabric type / Yarn type Length (in meters or yards) Weight (optional) Step 3: Assign Status Select the current status of the taka, such as: In Production Ready for Inspection Approved Ready for Sale Step 4: Save the Taka Record Click Save & Continue to store the entry. The taka will now appear in your Taka Flow Dashboard. Step 5: Track Movement From the dashboard, you can monitor the movement of each taka: Production → Inspection → Warehouse → Sales. Update status as the roll moves through each stage. Troubleshooting Tips Duplicate Taka Number? Make sure each roll has a unique ID. Wrong entry? Use the Edit option before finalizing. Missing data? Ensure machine number and length are entered correctly to avoid mismatches. Next Steps Now that you know how to manage Taka Flow in LoomMate, you can: Link takas with Sell Orders for accurate stock updates Generate Reports to see production vs. sales performance Continue learning with our next guide: How to Add a Yarn Company in LoomMate

Scroll to Top